

Looking for quality gardening tools and supplies? Browse our recommended garden products — hand-picked by the GardenWizz team.
There’s something almost magical about watching a seed — no bigger than a fleck of pepper — push its first roots into the soil and unfurl a pair of delicate green cotyledons. The RHS soil testing guide provides detailed advice on understanding your soil type… If you’ve never started plants from seed, you’re missing one of the most rewarding experiences in gardening.
Shop Related Products: Seed Tray • Propagator • Plant Label
For more on essential mulching: single, see our guide.
For more on proven first-year vegetable, see our guide.
Related: Garden Planning 101: Mapping Out Your Garden Space Natural Pest Deterrents: Plants That Repel Pests
Plus, starting from seed opens up a whole world of varieties you’ll never find at the local nursery. Want to grow a Purple Ukrainian tomato or a Lemon cucumber? Seeds are your passport to garden adventures you can’t buy off a shelf.
When to Start Seeds
Timing is everything. Most seed packets tell you to start indoors 6-8 weeks before your last expected frost date. You can find your local frost date by searching online or checking with your county extension office. Starting too early leads to leggy, root-bound seedlings. Starting too late means your plants don’t have enough time to mature before the season ends.
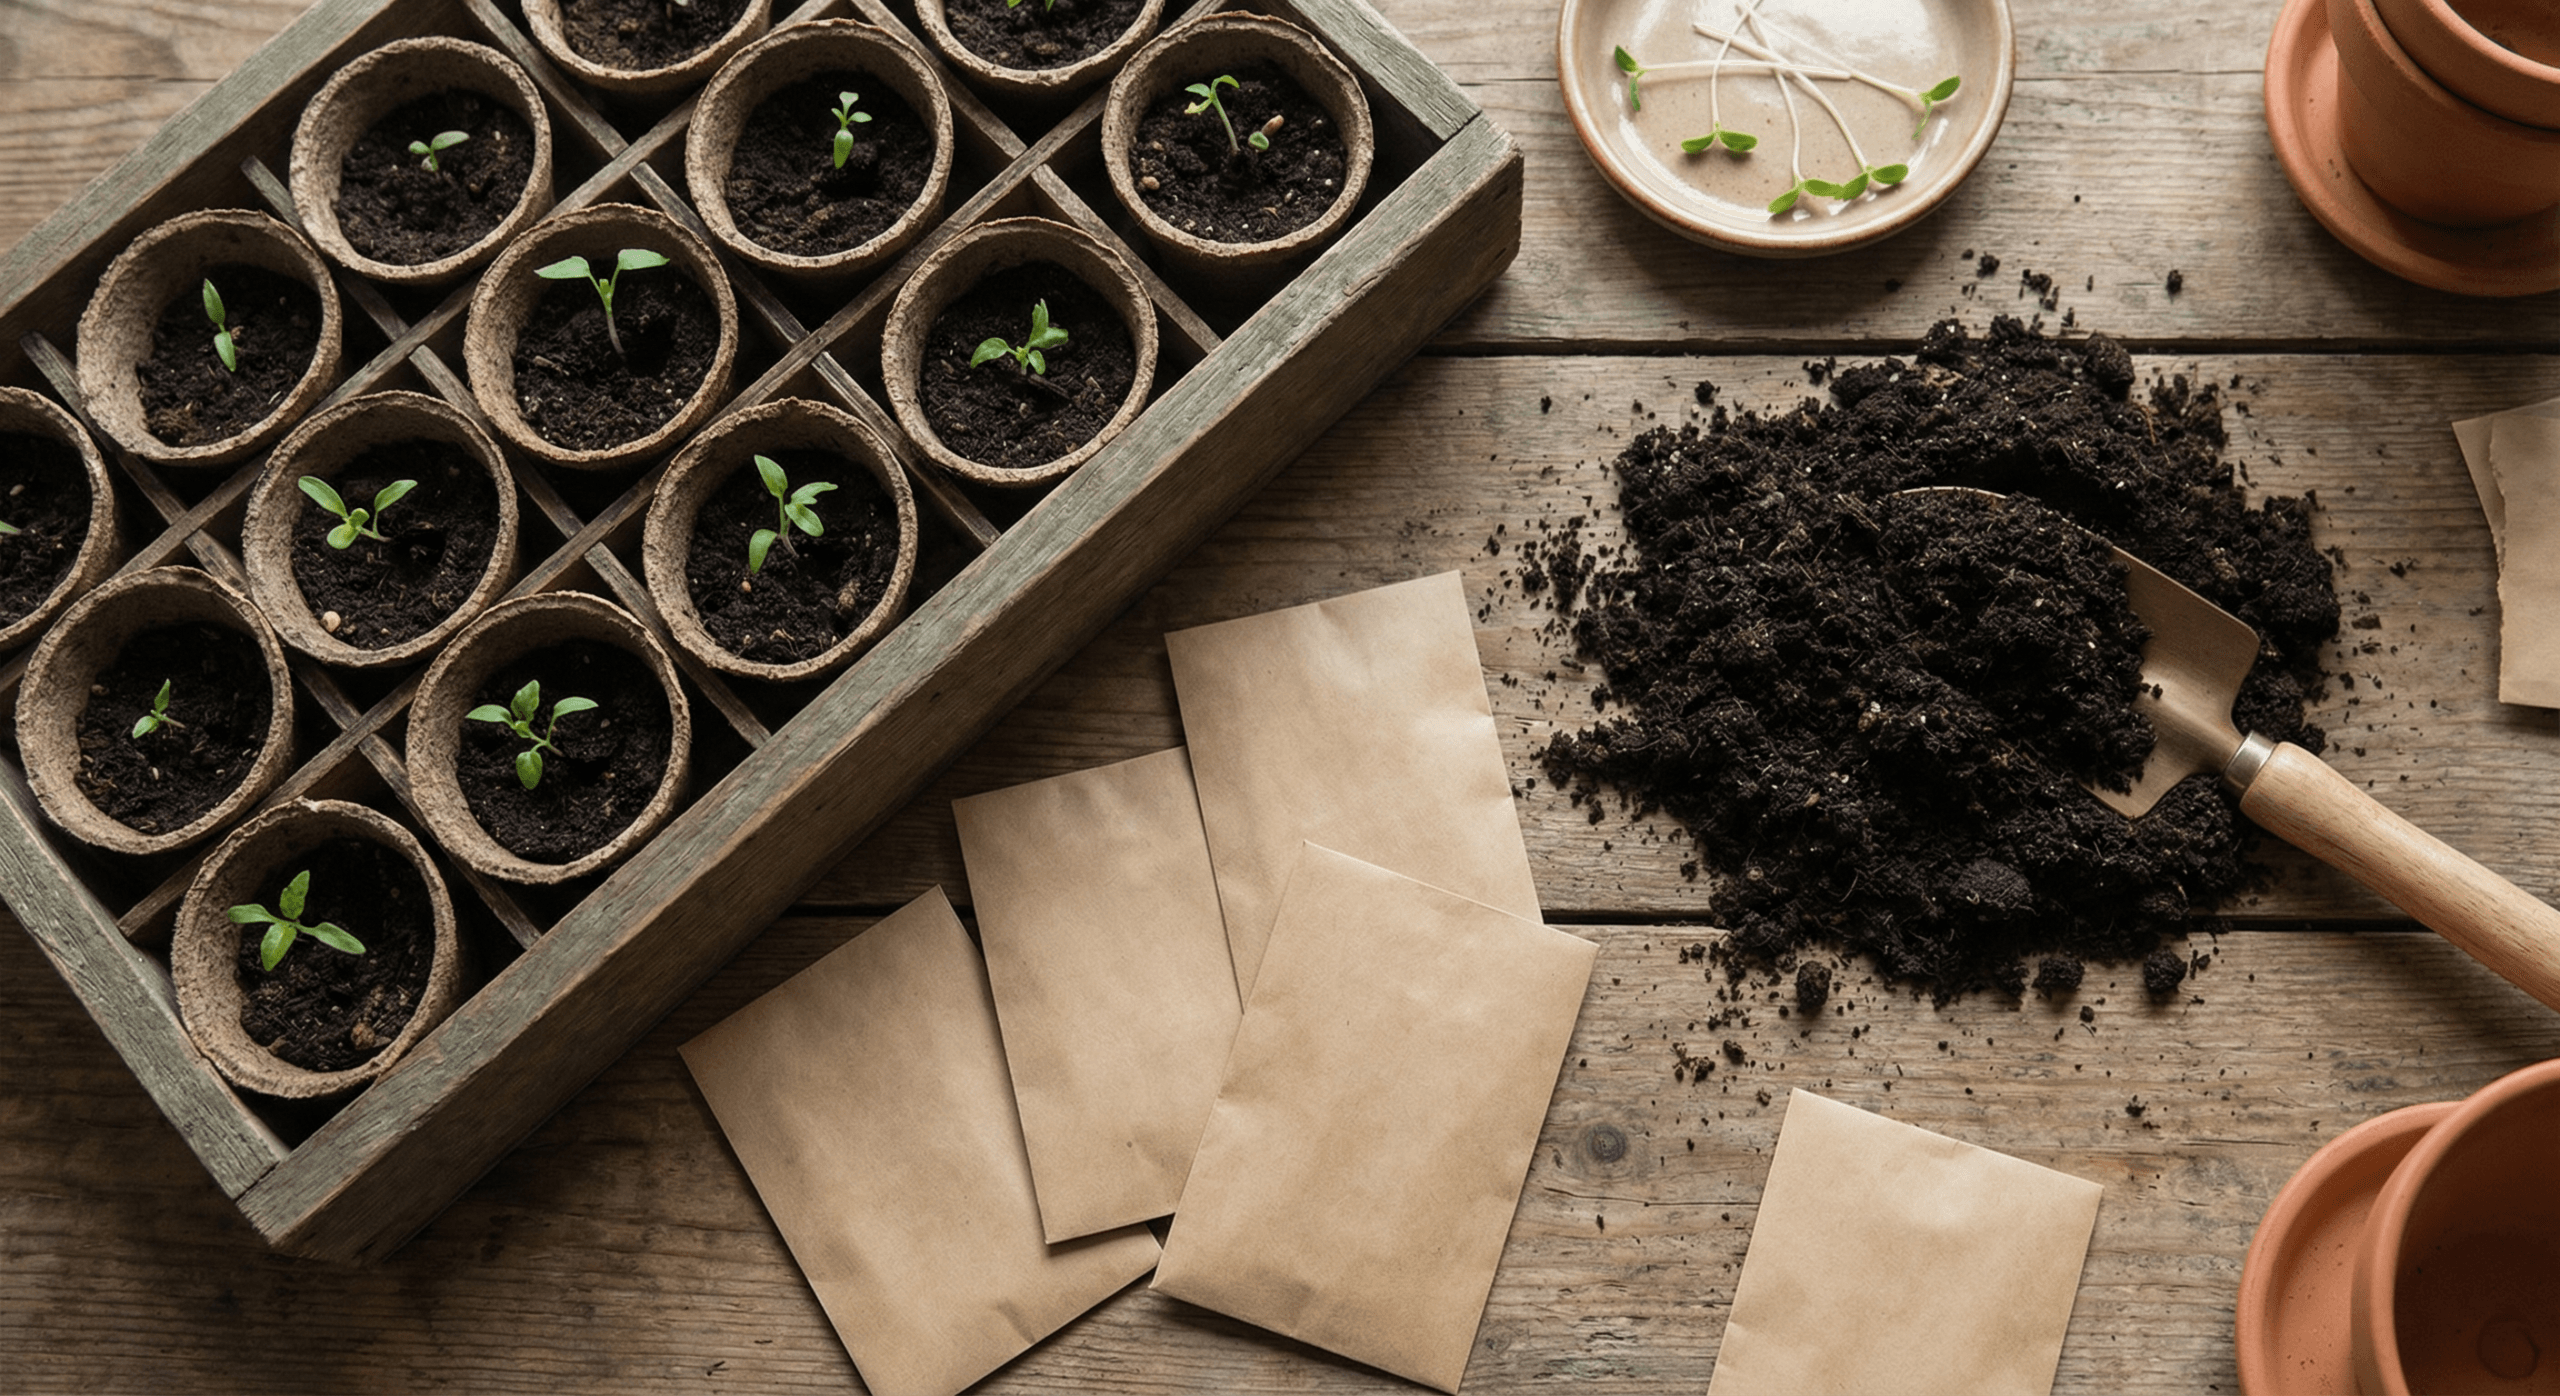
The Essential Supplies
You don’t need much to get started — and you certainly don’t need to spend a fortune at the garden center:
- Seed-starting mix — NOT regular garden soil. Seed-starting mix is sterile, fine, and lightweight, perfect for tender young roots. Garden soil is too heavy and can harbor diseases.
- Containers — Seedling trays, peat pots, recycled yogurt cups (with drainage holes), or even eggshells. Any container 2-3 inches deep works perfectly.
- A warm spot — Most seeds germinate best between 65-75°F (18-24°C). A sunny windowsill, the top of a refrigerator, or a Use a propagation heat mat to maintain consistent temperature for germination all work great.
- Grow lights — Optional but highly recommended. Seedlings need 12-16 hours of light daily.The RHS watering guidelines cover efficient watering techniques for gardens of all sizes. RHS watering guidelines has detailed guidance on this topic.. Without enough light, they become leggy and weak.
- Spray bottle or gentle watering can — Seeds and seedlings are delicate. Flooding them is a common mistake — water gently!
Step-by-Step: How to Start Seeds
Step 1: Pre-Soak Large Seeds (Optional)
Seeds with hard shells — like beans, peas, and morning glories — benefit from overnight soaking in warm water. This softens the outer coat and speeds up germination.
Step 2: Fill Containers with Seed-Starting Mix
Moisten the mix thoroughly before filling your containers. It should be damp but not dripping — like a wrung-out sponge. Fill containers to about 1/2 inch from the top.
Step 3: Plant at the Right Depth
General rule of thumb: plant seeds at a depth of 2-3 times their diameter.Tiny seeds like lettuce barely need covering — just press them gently onto the surface. RHS leafy crops guide has detailed guidance on this topic. Larger seeds like squash go about 1 inch deep. Check the seed packet — it always knows best.
Step 4: Cover and Label
Cover the container with a clear plastic dome or plastic wrap to trap humidity.This creates a mini greenhouse effect. RHS greenhouse gardening has detailed guidance on this topic. Write plant names and dates on popsicle sticks or tape — you WILL forget what you planted.
Step 5: Keep Warm and Wait
Place your trays somewhere warm. Check daily. Within 5-14 days (depending on the plant), you’ll see the first green shoots emerging. Once sprouts appear, remove the cover immediately — trapped moisture causes fungal problems like damping-off.
The Most Common Seed-Starting Mistakes (And How to Avoid Them)
- Overwatering: The 1 killer of seedlings.Let the top of the soil dry out slightly between waterings, RHS soil testing guide has detailed guidance on this topic.but never let it fully dry out.
- Insufficient light: Seedlings reaching for the window? They need brighter, more consistent light than a windowsill typically provides. Consider a $20 grow light.
- Starting too early: Big pots and plenty of space don’t make up for root-bound seedlings that have been sitting too long indoors. Know your transplant date and count backward.
- Skipping hardening off: Plants started indoors need a gradual transition to outdoor conditions. Skip this step and your seedlings will go into shock when planted out.
Hardening Off: The Essential Final Step
About 7-10 days before your transplant date, start putting your seedlings outside for a few hours each day. Choose a sheltered, shady spot. Gradually increase their time outdoors and expose them to more sun over the course of a week. By the end, they should be spending the night outside. This toughens up their cell walls and prepares them for real-world growing conditions.
Starting seeds is one of those gardening skills that gets better with every attempt. Your first tray might be a disaster — that’s normal and expected! Keep a simple journal of what you planted, when, and what worked. Before you know it, you’ll be the neighbor everyone asks for seedlings.
Frequently Asked Questions
When is the best time to do this in the UK?
The ideal timing depends on your location and the specific task. Spring (March-May) is generally the busiest gardening season in the UK, though autumn is perfect for planting and soil improvement.
Do I need expensive equipment to get started?
No. A few quality basic tools — a trowel, hand fork, watering can, and gloves — will see you through most beginner gardening tasks.
Is this suitable for small spaces or containers?
Most gardening tasks can be adapted for small spaces. Containers, grow bags, and raised beds all work well on patios, balconies, and even windowsills.
Can beginners do this successfully?
Absolutely. UK gardens are full of challenging conditions — clay soil, shade, slugs — but beginners achieve great results every year by starting small and learning as they grow.


