
How to Sow Sweet Peas for Strong, Early Flowers
This route protects the roots from unnecessary disturbance and gives the developing shoots something to climb before they begin to flop.
Overview
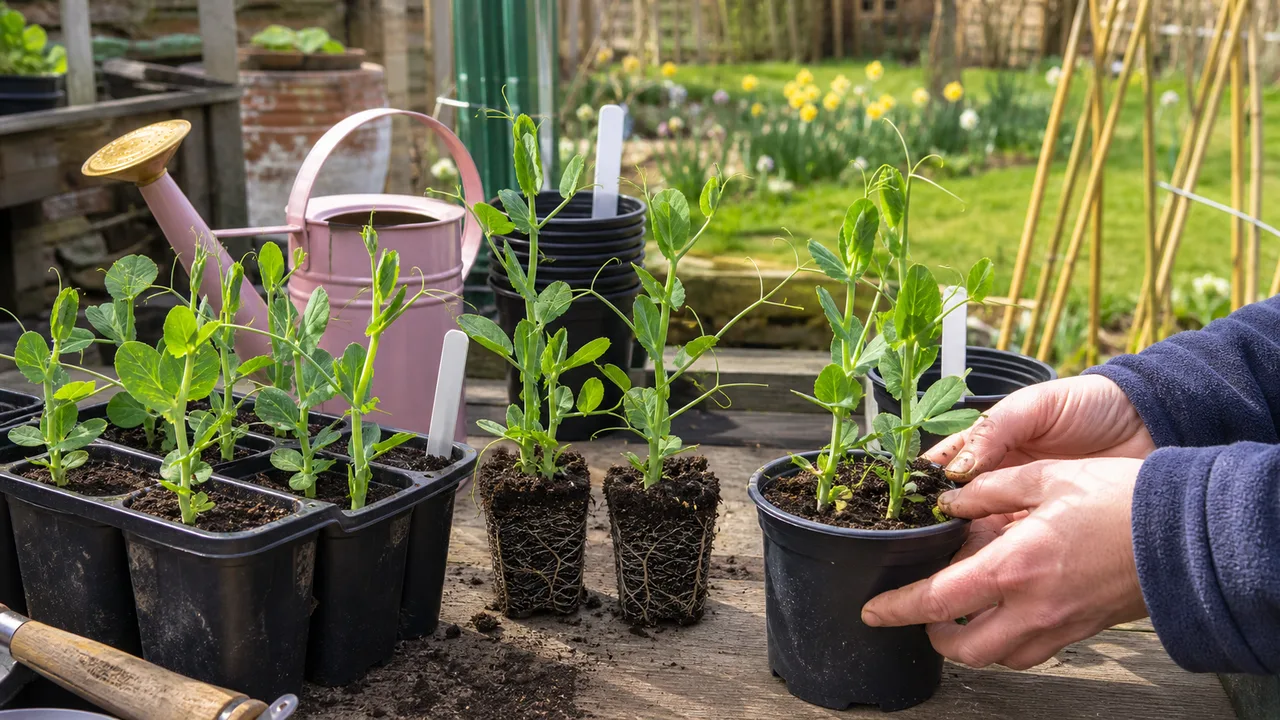
Sweet peas reward a little care at the start. Sow annual sweet pea (Lathyrus odoratus) seed in deep, well-drained pots, keep the young plants bright and cool after they emerge, then move each intact root plug into the garden beside its support. This route protects the roots from unnecessary disturbance and gives the developing shoots something to climb before they begin to flop.
For a straightforward spring method in the UK, sow from late January to April. The exact planting-out day depends on local conditions: harden the seedlings off first and wait until the risk of frost has passed. According to the Royal Horticultural Society’s guide to growing lathyrus, spring-sown plants flower in about 12–14 weeks, although weather and growing conditions will affect progress.
Sweet peas are ornamental plants, not a crop. Their pods can look like edible pea pods, but they are poisonous and must not be eaten. Keep seed and pods away from children and make sure everyone who uses the garden understands the difference.
What You'll Need
- Annual sweet pea seed
- Deep root trainers or clean 9 cm pots with drainage holes
- Peat-free seed compost
- A label and pencil
- A finger or dibber for making sowing holes
- A watering can fitted with a fine rose
- An optional clear cover for the pots until shoots emerge
- Canes, pea sticks, netting or trellis
- Twine for guiding wayward shoots
- Slug and snail protection suited to your garden
Deep containers give the roots room without requiring an invented “perfect” depth. Root trainers and 9 cm pots both suit the RHS pot-sowing method. If you prefer to use one 13 cm pot, sow five to seven seeds with 2–3 cm between them. A single seed in each deep cell or pot is simpler when you want to plant later without separating intertwined roots.
Use peat-free seed compost rather than rich potting compost. Seed compost is free-draining and low in nutrients, which is appropriate at this early stage. Whatever container you choose, check that water can escape freely from its base.
When to Do It
The main window for this guide is late January to April. A later sowing within that period can still work; it simply shifts the likely flowering period. October or November sowing is another option, but autumn-raised seedlings need suitable protection and are not the beginner route described here.
Plan the second half of the job as carefully as the first. Indoor-raised seedlings need 10–14 days of hardening off before planting. Begin only when the local forecast allows you to increase their time outside gradually, and do not treat April as a guaranteed planting date everywhere in the UK. A cold spell can check tender growth, so use the condition of the plants and the forecast rather than the calendar alone.
Prepare the final position before planting day. Sweet peas prefer a sunny site with fertile, well-drained soil. Put the canes, pea sticks, netting or trellis in place before handling the seedlings; doing this early avoids working around delicate stems and lets you set each plant close enough for its tendrils to find support.
Step-by-Step
Fill the deep pots
Fill clean root trainers or 9 cm pots with peat-free seed compost, leaving the surface level rather than tightly compacted. Settle the compost gently so there are no large gaps, while keeping its open, free-draining texture. Confirm that every container has unobstructed drainage holes before you sow.
If you are using a 13 cm pot for several seeds, allow room to place five to seven seeds 2–3 cm apart. Otherwise, one seed per deep cell or pot keeps later transplanting simple. Label the pots with the cultivar and sowing date now, while both are easy to remember.
Sow the seed 1 cm deep
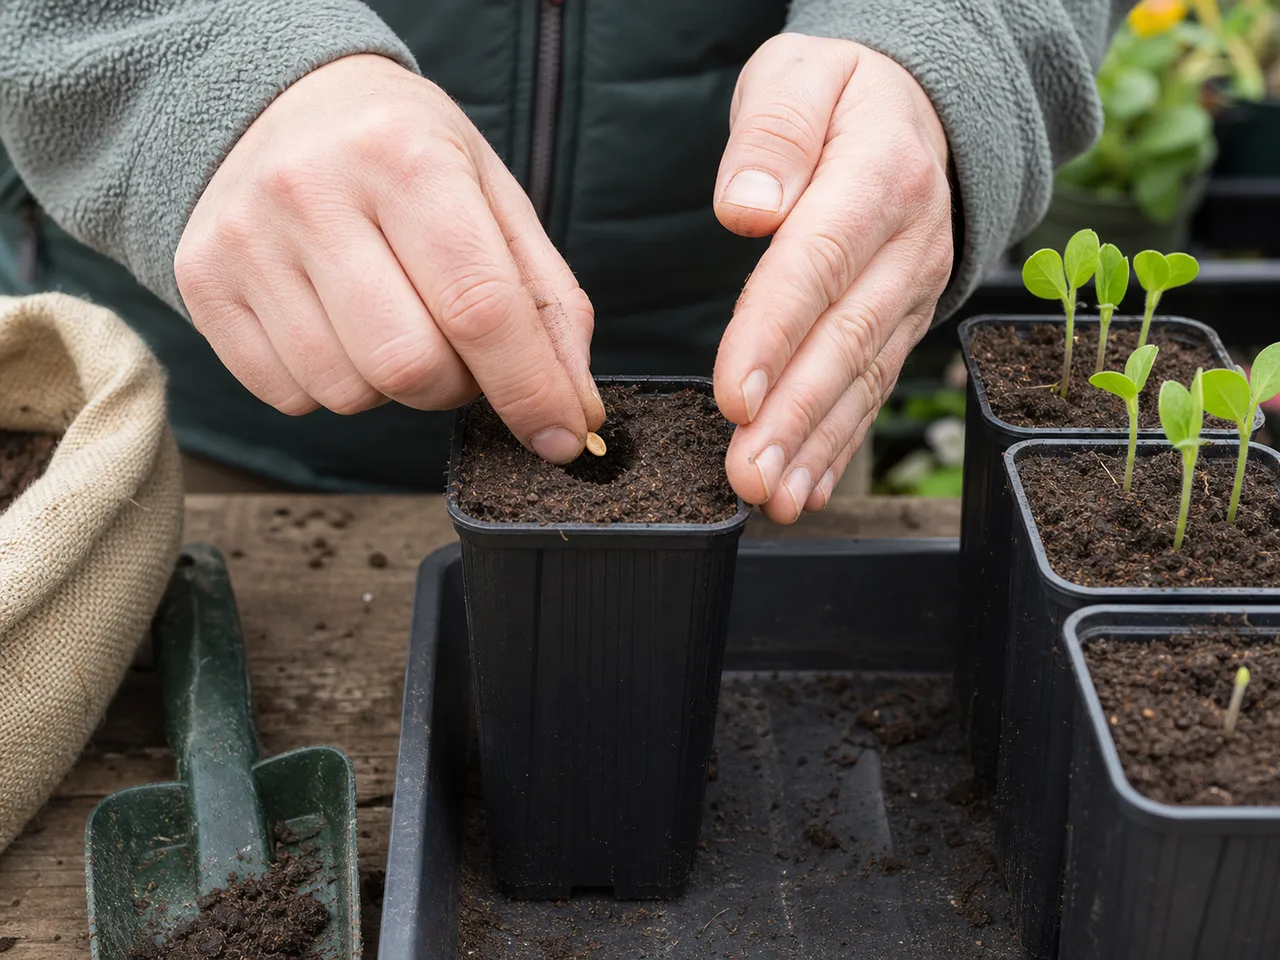
Make a 1 cm-deep hole for each seed with a finger or dibber. Place the seed in the hole, cover it with compost and gently level the surface. The visible cue is a filled, even surface with the seed fully covered—not a seed left exposed and not a hole much deeper than 1 cm. The greater depth sometimes given for direct sowing in the ground does not apply to this pot method.
Most dry seeds can be sown as they are. If a hard seed is placed on moist kitchen tissue in a warm airtight container, sow it promptly as soon as it swells or sprouts. Overnight soaking is optional, but a soaked seed can rot if it is not sown straight away. Chipping a stubborn unswollen seed requires a sharp penknife and should be left to an adult; the simpler and safer beginner choice is to avoid chipping unless it is genuinely needed.
Water and uncover the seedlings
Water with a fine rose so that the compost becomes evenly moist without being churned up. Aim for a damp surface without a glossy film or standing water. Keep the pots at about 15°C and check the compost rather than watering on a rigid schedule: add water when necessary, but never leave the containers standing waterlogged.
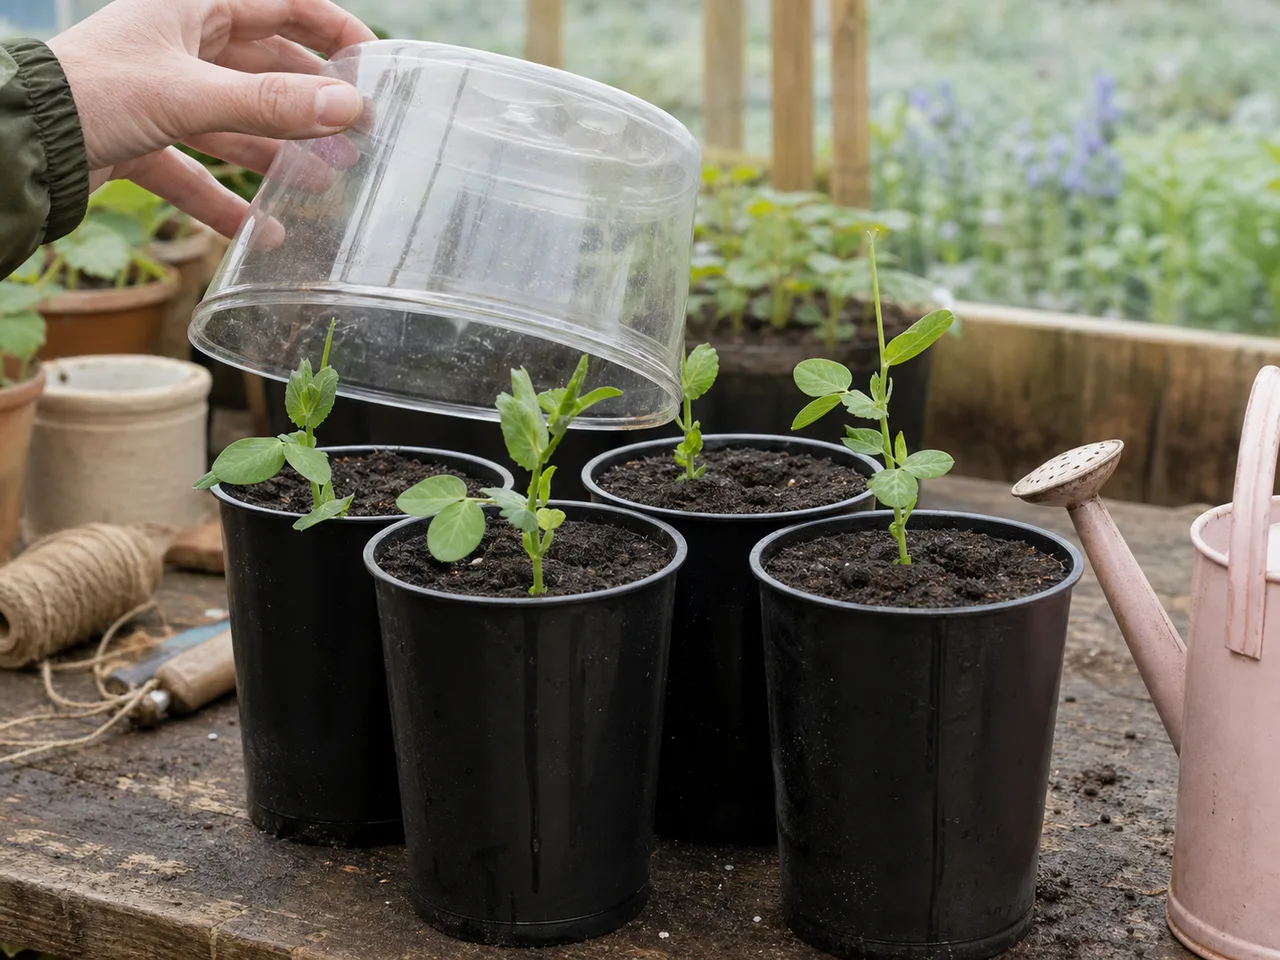
A clear cover can help maintain conditions before emergence, but it is optional. Remove it when the shoots appear, then give the seedlings bright, cool conditions. Healthy new shoots should stand upright and look green. Warm, enclosed or poorly lit conditions after emergence encourage weak, stretched growth, so the appearance of the shoots is the signal to change their environment.
Pinch out the central tip
Wait until a seedling is 7.5–10 cm tall. Find the soft central growing tip, then pinch it out just above a healthy leaf. Remove only that tip: keep the leaf and the lower stem intact. This redirects growth into side shoots, producing a sturdier plant instead of one long, weak stem.
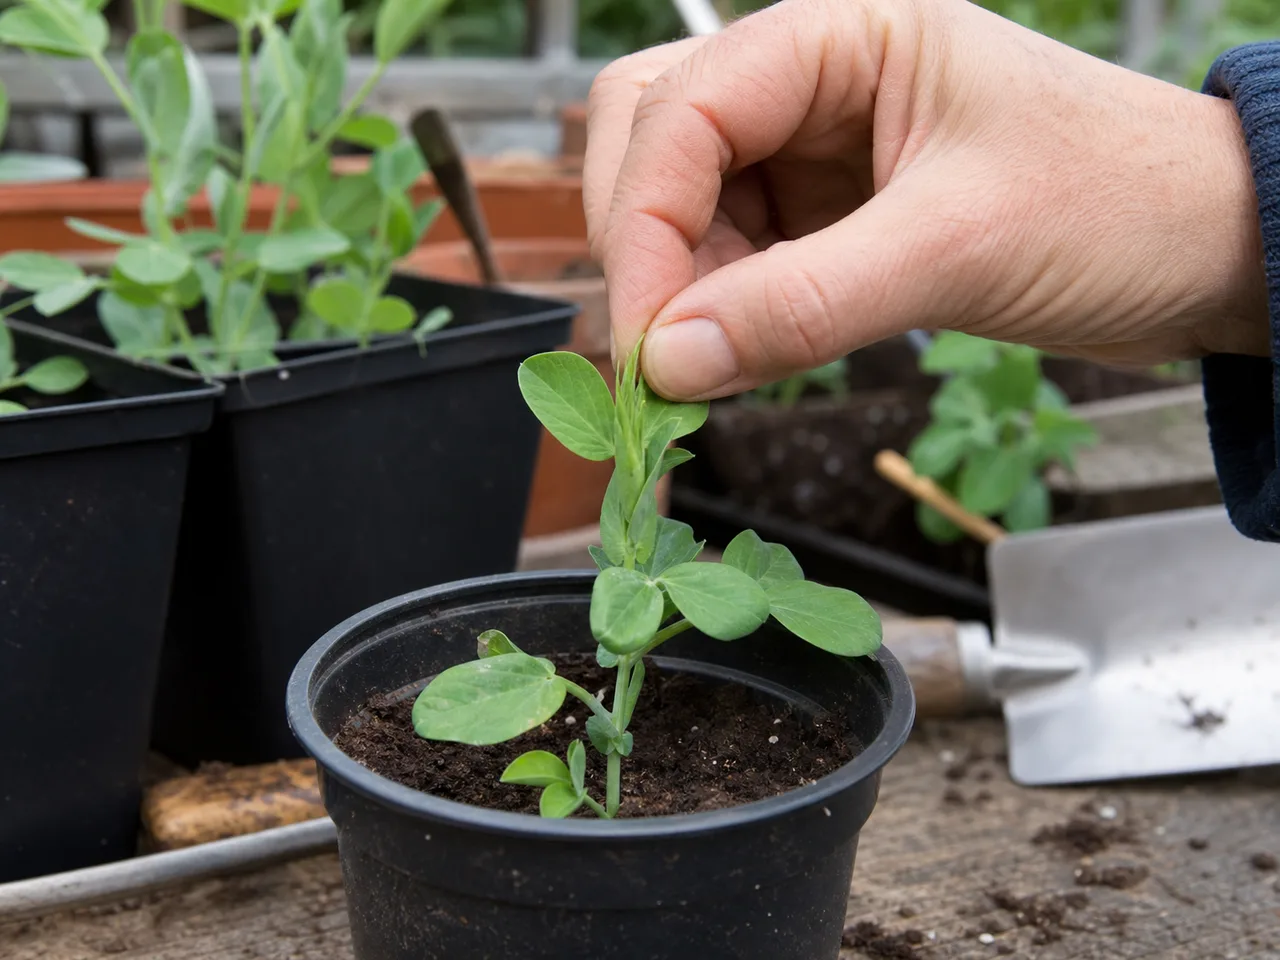
Look for developing side shoots afterwards; they are the visible sign that the pinch has done its job. If the seedling has not yet reached the stated height, let it grow on rather than pinching early simply because a calendar reminder says it is time.
Harden off and set up support
Harden indoor-raised plants off over 10–14 days by gradually increasing the time they spend outside. Use a sheltered position at first and respond to the weather. If a significant temperature fall is forecast, protect the young plants rather than forcing the process to fit a fixed date.
Meanwhile, install the final support in the sunny, well-drained planting area. Canes, pea sticks, netting and trellis can all work. Positioning the structure now means the roots and stems will not be disturbed by construction after planting. Water the seedling pots before you begin the final move so each root plug is moist and more likely to hold together.
Plant the intact plug beside support
Ease a plant from its pot or module while supporting the container and root ball; never pull it out by the stem. The successful result is one coherent, moist plug with its roots and stem intact. Do not tease seedlings apart or strip compost from the roots.
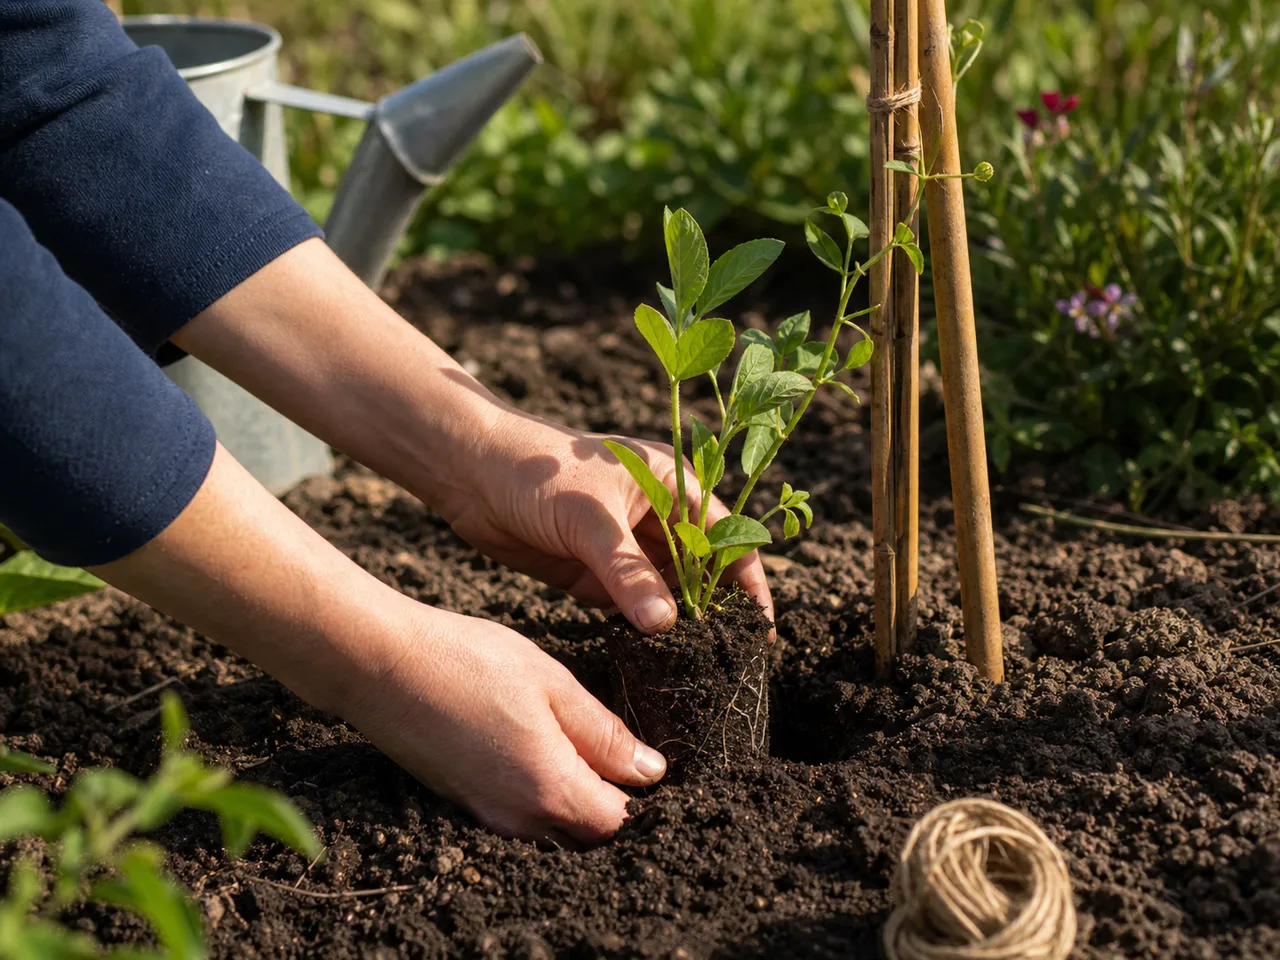
Plant each plug 20–30 cm from its neighbours and within 5–7.5 cm of the prepared support. Settle the soil around the plug without crushing the stem, then water immediately so moisture reaches the full root area. Guide a wayward shoot towards the support with twine if needed, keeping the tie loose enough not to constrict growth. Once the plant is close and secure, its tendrils have a realistic chance of finding the support.
Aftercare
Young sweet peas need consistent moisture, especially while they establish. In dry weather, check plants growing in the ground every three to four days and water deeply enough to moisten the full root area. Check pots daily because they dry more quickly. These are checking intervals, not instructions to add water regardless of conditions: feel the compost or soil first and avoid leaving the roots saturated.
Protect tender growth from slugs and snails using a method appropriate to your garden. Watch the shoot and flower tips for aphids. Drought can encourage powdery mildew, while drought or temperature stress may scorch foliage or cause buds to drop, so steady watering and sensible weather protection matter more than trying to repair badly stressed plants later.
As the stems lengthen, guide any wandering growth back towards the support and tie it loosely where necessary. Container-grown plants benefit from a potassium-rich feed. Once flowering begins, pick blooms regularly or deadhead faded flowers before pods develop. Allowing pods to form tells an annual sweet pea to move towards seed production, shortening the display.
Common Mistakes
Leaving compost sodden. Moist compost supports germination; waterlogged compost can rot seed. Use containers with drainage, water gently and respond to what the surface looks and feels like rather than topping up automatically.
Treating seed preparation as compulsory. Most seed can be sown dry. If you soak or pre-sprout hard seed, sow it as soon as it swells. Do not leave softened seed sitting wet, and do not introduce a sharp knife to the job unless an adult is dealing with a genuinely stubborn seed.
Keeping emerged seedlings warm and covered. The cover has finished its job when shoots appear. Remove it and provide bright, cool conditions; upright green seedlings are the goal, not long, pale growth reaching for light.
Pinching the wrong part. At 7.5–10 cm, take only the soft central tip just above a healthy leaf. Removing leaves or cutting too low defeats the purpose. Wait for side shoots to confirm that the plant is responding.
Skipping hardening off. Moving a sheltered seedling straight into cold, exposed conditions can check its growth. Allow 10–14 days and adjust the process when the forecast turns sharply colder.
Pulling seedlings apart at planting time. Sweet peas are better moved as an intact plug. Water first, handle the pot and root ball rather than the stem, and place the plant beside support that is already standing.
Letting flowers turn into pods. Regular picking and deadheading keeps an annual sweet pea flowering. Remove pods if they begin to form, and remember that neither sweet pea seeds nor pods are edible.
Plants in this guide
Recommended Products
GardenWizz earns a commission from qualifying purchases made through affiliate links on this page (including links within the article) — as an Amazon Associate, and from Thompson & Morgan via the Awin network. This does not affect the price you pay. See our disclaimer for details.
Related Articles
More → Growing Guide
How to grow ornamental grasses in pots
5 August 2026Grow ornamental grasses successfully in containers with advice on pot size, compost, watering, feeding, winter care and long-term maintenance.
 Growing Guide
How to plan a perennial border
5 August 2026Plan a balanced perennial border with practical guidance on position, colour, height, spacing, flowering succession and year-round structure.
 Growing Guide
How to take hardwood cuttings
29 July 2026Take hardwood cuttings from suitable dormant shrubs and climbers with this step-by-step guide to timing, preparation, rooting and aftercare.