Containers for Growing Vegetables
Growing vegetables in containers is the single most useful trick for UK gardeners with bad soil, small gardens, paved courtyards, or rented flats where the only "ground" available is a balcony slab.…
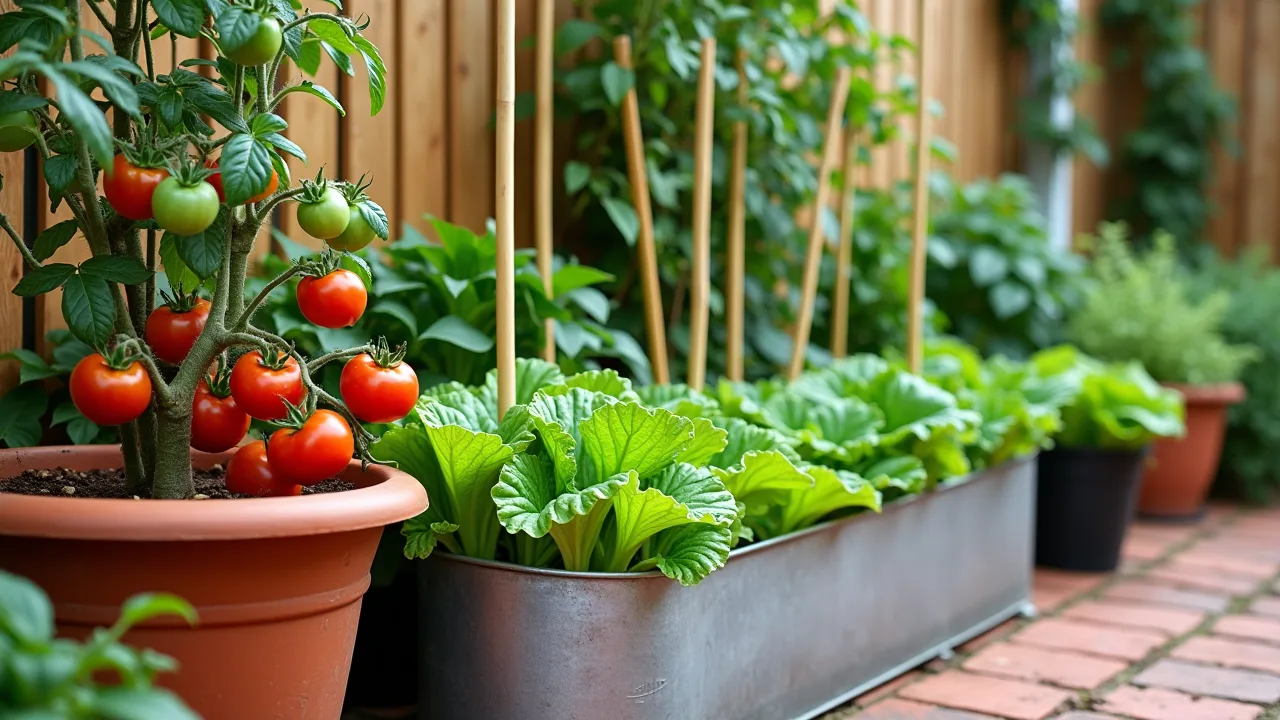
Growing vegetables in containers is the single most useful trick for UK gardeners with bad soil, small gardens, paved courtyards, or rented flats where the only "ground" available is a balcony slab. It also gives you a clean, controllable environment for the trickier crops — carrots that don't fork in stony ground, salads that don't get slug-eaten to stumps, and tomatoes that ripen in a suntrap by the back door. Done well, a few pots will out-yield the same area dug into poor ground.
Why containers work so well in the UK
Most UK soil is either heavy clay that stays cold and wet through spring, or thin, stony soil over chalk that dries out by June. In a pot you replace that problem with a known, free-draining mix. You control the water, the feed, and the position — moving lettuces into shade when a heatwave hits, or putting peppers against a south wall for August. The trade-off is that pots dry out fast and have a small root run, so success is mostly down to picking the right container, the right compost, and watering consistently.
When to start
You can plant into containers in almost any month in the UK, but the main growing seasons are:
- March to May — sow and plant most crops: potatoes, peas, broad beans, lettuce, radish, carrots, beetroot, onions from sets, herbs.
- June — plant out tomatoes, peppers, cucumbers, aubergines, basil once the last frost has passed (usually late May in the south, early to mid June further north and at altitude).
- July to August — successional sowings of lettuce, radish, rocket, dwarf beans, pak choi. These bolt fast in long, hot spells, so sow in short drills every 2–3 weeks.
- September to October — autumn salads, spring cabbage, Japanese onions, garlic, and overwintering broad beans (Aquadulce Claudia sown in November is the classic).
A container is also a useful "get it going early" tool: a pot of compost on a windowsill or in a cold frame warms up two to three weeks ahead of open ground, letting you start tomatoes, chillies, and aubergines in March even in the north.
What you'll need
Containers. Size matters more than material. As a rule of thumb:
- Salad leaves, herbs, radish, spring onions: 15–20 cm deep is plenty. A standard seed tray, a windowbox, or a 30 cm pot all work.
- Beetroot, dwarf carrots (Paris Market, Chantenay), baby turnips, garlic: 20–25 cm deep.
- Maincrop carrots, parsnips, dwarf beans, peas, kale, patio aubergines: 30–40 cm deep.
- Potatoes, tomatoes, courgettes, peppers, cucumbers, brassicas: 40–50 cm deep and at least 30 cm wide. A standard "tomato pot" or a 40-litre grow bag laid flat will just about do one tomato or three to four pepper plants.
Terracotta looks good but dries out fast. Glazed ceramic, plastic, and fabric grow bags hold moisture longer. Whatever you use, it must have drainage holes — if it doesn't, drill at least four 6–8 mm holes in the base. Raised beds and large planters (1 m × 1 m and up) are essentially large containers and follow the same rules.
Compost. Use peat-free multipurpose compost for most crops, or a peat-free vegetable-and-tomato mix. John Innes No. 2 (loam-based) is heavier, holds water better, and is a better choice for long-term containers — tomatoes, fruit trees, and anything that will sit in the same pot for more than one season. Avoid garden soil: it's too dense, it doesn't drain, and it brings in weeds and soil-borne disease.
Feed. Compost only feeds a plant for roughly four to six weeks. After that you need a liquid feed — tomato feed (high potash, e.g. a 4-3-8 analysis) for fruiting crops, a general-purpose feed (e.g. 6-3-3) for leafy crops. Slow-release fertiliser pellets mixed into the compost at planting are a useful belt-and-braces.
Other kit. A watering can with a fine rose, a hand trowel, a bucket for mixing, and some crocks (broken polystyrene or terracotta) for the bottom of deep pots. Mulch (gravel, slate, or composted bark) on the surface slows evaporation in summer.
Step-by-step: setting up a productive container
- Soak the pot if it's terracotta. Dry terracotta wicks moisture out of the compost. Submerge new terracotta pots in water for an hour before planting.
- Cover the drainage holes. Place a piece of broken pot or a piece of landscape fabric over each hole to stop compost washing out while still letting water drain. Don't block the hole with stones to a depth of several inches — that's an old myth and just creates a saturated layer.
- Fill to within 2–3 cm of the rim. This leaves a watering "lip" so water doesn't run straight off the surface. Firm lightly — a 40-litre bag of compost fills about three 30 cm pots.
- Pre-water the compost. Compost straight out of the bag is often dry in the middle. Water it thoroughly the day before planting, then mix it through.
- Plant at the right depth. Tomato seedlings go in deeper — up to the first true leaves — as the buried stem roots. Lettuce, herbs, and most things go in at the same depth they were in the module. Potatoes go in with 10 cm of compost below the tuber.
- Water in well. Even after a wet compost, give each pot a full can to settle the compost around the roots.
- Position before you fill. A 40-litre pot full of damp compost weighs roughly 40–50 kg. Move it first, plant second.
- Mulch the surface. A 1–2 cm layer of bark, gravel, or even finished compost reduces evaporation by a third in summer.
Common mistakes to avoid
- Small pots for hungry crops. A 20 cm pot won't grow a courgette — it'll produce one or two fruits then collapse. Match the pot to the crop as in the size guide above.
- Letting the compost dry out fully. Once peat-free compost bone-dries, it shrinks away from the sides of the pot and is hard to re-wet from the top. Soak from below in a sink, or stand the pot in a bucket of water for 20 minutes, then resume normal watering.
- Overwatering in cool weather. The opposite mistake. In April and October, waterlogged compost rots roots fast. Stick a finger 3 cm down — if it's damp, don't water.
- Crowding. Spacings on seed packets assume open ground. In a pot, halve them at most, and use the packet spacing as the absolute minimum. A single courgette per 45 cm pot, not three.
- Forgetting to feed. A container is a closed system — nutrients wash out the bottom every time you water. Plan to start liquid feeding six weeks after planting.
- No crop rotation in repeat-use pots. If you grow tomatoes in the same pot year after year, build-up of root-rot fungi is almost guaranteed. Either change the compost every year, refresh the top 10 cm, or rotate to a different plant family (brassicas, then legumes, then roots, then fruiting).
- Leaving pots against a wall in winter. Even hardy plants in pots are more vulnerable to frost because their roots are exposed on all sides. Move them to a sheltered spot or wrap the pot in bubble wrap.
Troubleshooting
Yellowing lower leaves on tomatoes. Usually magnesium deficiency, common in pots. A pinch of Epsom salts (magnesium sulphate) in a litre of water, watered onto the compost once, fixes it. Don't overdo it.
Tomato blossom end rot (black, sunken base on the fruit). Not a disease — it's calcium deficiency caused by erratic watering. The plant can't take up calcium from a dry pot, then gets a flood and can't move it fast enough. Water consistently and mulch.
Lettuce bolting in summer. Heat and a small root run. Move pots into afternoon shade, water in the morning, and switch to slow-bolt varieties (Lollo Rossa, Marvel of Four Seasons, Little Gem).
Carrots forked or stunted. Almost always fresh manure or stony compost. Use multi-purpose or sieved garden compost, never fresh manure, and grow short-rooted types in pots under 30 cm deep.
Slugs. A 15 cm copper tape ring around the pot, or a 5 cm-wide band of vaseline smeared on the rim, stops most of them. Beer traps in saucers work for a few weeks at a time.
Greenfly on peppers and aubergines. A strong spray of water knocks them off. If they come back, a dilute soap spray (a few drops of washing-up liquid in a litre of water) clears them.
A simple starter plan
If you've never done this before, try one 40 cm pot of cherry tomatoes (one plant, a tumbling variety like Tumbling Tom if the pot is on a wall), one 30 cm pot of mixed salad leaves, and one 40 cm pot of Charlotte or Maris Peer potatoes. That fits on a 1 m × 1 m slab of paving, will produce food from late June to October, and teaches you the two real container skills — watering and feeding — in one season.
Start in mid to late May in the south, late May to early June further north. By August you should be picking salad every few days, harvesting potatoes in a single lift, and have enough tomatoes on the vine to wonder what to do with them.
Containers won't feed a family year-round, but they will give you fresh, clean, UK-grown veg from a doorstep, a balcony, or a back yard — and once you've had a home-grown tomato out of your own pot, supermarket ones never taste the same again.
GardenWizz earns a commission from qualifying purchases made through affiliate links on this page (including links within the article) — as an Amazon Associate, and from Thompson & Morgan via the Awin network. This does not affect the price you pay. See our disclaimer for details.